Monday, December 20, 2010

DT Rising

After a protracted struggle of my own that included busted knuckles and a fair bit of frustration I finally sent the bike off to the experts at O'Hanlon's Motorcycles hidden down in SOMA. Then after a grueling wait that stretched on and on as even the experts got frustrated the problem was finally tracked down.

The DT now has new points and condenser, a new lighting coil, primary coil, secondary coil, turn signal relay, a rewired tail light and a rewired turn signal. Though, it was the lighting coil all along and admittedly the weirdest and last thing anyone expected to be wrong preventing it from getting a spark. So, after a cursory carb rebuild, adjusting the cables and putting in some fresh gas it lights off on the second kick even when it's cold. I suppose the upside and those months and dollars spent resurrecting the beast is that it's about as reliable as it's going to be short of rebuilding the top end.

I'm in the snowy Midwest until after Christmas looking forward to getting back to the city and hopefully off down the coast for a day or two. Hoping I can get to my favorite salvage yard and score a bigger tank for the bike before I head back west.

I'd also like to add that Dave at O'Hanlon's really did me right on this and was more than fair on the price. I sincerely hope I don't run into another problem I can't solve on my own but if I do I won't hesitate to have Dave and his crew bail me out.

Saturday, November 13, 2010

Even the smallest garden

It would be nice to have a half acre of decent dirt to raise some food on but living in the city I have far less than that. We do have a few nice beds and a fantastic plum tree in the yard we share with our building. So, instead of trying to square foot garden enough tomatoes for a season or a bed of potatoes I've focused my efforts on a great herb garden. I also grow a few things that are really more than herbs but serve to flavor other things rather than being a dish unto themselves. Garlic and shallots are really simple and go with about anything. They can both be grown in the ground or in pots and can even be used as edible centerpieces or decorative plants. You haven't tasted garlic until you've had green garlic. Just plant the cloves and use the greens like you would green onions. Truly fantastic.

In essence you can buy a lot of potatoes for next to nothing and then throw in some fresh herbs and make something really great, often something that simply can't be had in most stores. 

Today's farmers market was a little on the ordinary side but I still managed to find an heirloom variety of mustard, some miner's lettuce and another type or rosemary for the garden. They'll go nicely with many of the things already out there ranging from Roman myrtle to several varieties of lavender and mint. I even have a patch of dandelions coming along nicely for the greens and maybe an attempt at dandelion jelly. 

Even if only a simple window box is all you can manage give growing something a try! 


Sunday, October 31, 2010

Palladium Boots

It'd been ages since I thought about Palladium boots until I ran across them in Lombardi Sports on Polk St. in San Francisco. My grandfather used to buy me surplus Foreign Legion boots when I was in high school and college. They were a standard "go to" shoe for me for years.

Light weight and built much like a canvas sneaker but with a lug sole and far more support, they make for an incredibly versatle shoe. They're  the kind of boot that keeps you from beating up your feet while not being so heavy as to make you regret wearing them 15 or 20 miles into your day. 

After tromping around San Francisco for a couple weeks in my new ones I'm happy to say they've managed to improve on an already great product. 

Thursday, October 7, 2010

Potting soil for carnivorous plants!

I've always liked carnivorous plants. Who doesn't think Venus Fly Traps are cool? So, I recently decided to give growing some another shot. I've killed a number of them in the past and thought it'd be a great opportunity to share what I learned after digging in and sorting out why. As it turns out there are two major factors in keeping carnivorous plants, water and soil. Sounds simple enough? Not really.

Carnivorous plants are even more sensitive than the orchids I used to keep. You've got to keep them wet and in a humid environment but you also need to be sure and only use distilled water or rainwater that is known to be clean and contaminant free. RO filtered water is alright but the filters are costly and you could kill your plants if they fail and you don't notice in time. Distilled water is cheap and widely available anyway so there's little excuse to not use it.

The essential soil mix is a 1/1 ratio of pre-wetted peat moss to clean sand that won't leach minerals or untreated perlite. on the surface it's just that simple but if you'd like to read more you ca check out the full step by step Instructable here.

http://www.instructables.com/id/Potting-soil-for-carnivorous-plants/

Opinel knives

I was finally in the right place at the right time and grabbed a new Opinel folder. I haven't had one since moving west and have been meaning to pick up a new one for ages. I was lucky enough to find a shop that carried the nicer ones ad got one with an olive wood handle.

Opinel has been around since the 1890's and is still a family run business in the Savoie region of France. It was one of the first knives I ever owned having gotten my first as a gift when I was 6 or 8 years old. Though my first Opinel was an even more simple "penny knife". I may have to track down one of those as well. That was such a good little knife...

They're just simple well made knives with such a classic design as to not really need much of an update even after more than 100 years. Similar to both Nontron and Laguiole the Opinel is the more likely knife you will find out in the world. One thing I like about them is that being priced reasonably they are knives you won't hesitate to use. This is a knife that successfully combines style and function with the bonus that they tend to look better with time and use.

Saturday, October 2, 2010

Still Here!

Hey folks,

haven't posted in ages but I am still out here. Keeping very busy at Instructables and doing more projects than ever. I'm also getting out and about and exploring more and more of not only the San Francisco Bay area but quite a few other places as well. In the coming weeks I hope to get back at this and work the blog into me regular routine. I'd like to post both my work projects as well as random things that I find interesting and a couple of projects here and there that I may not be posting on Instructables, though it seems there's room for just about everything on there.

Saturday, July 17, 2010

Bacon!!

Another awesome food day today. Our plum tree has been in season for about a week now and I was able to put up five quarts today. I missed it last year altogether as we were out of town. I even got enough last week to make a nice loaf of bread and share about a dozen plums with friends.

I also picked up a couple pounds of pork belly and my friend Morgan was kind enough to give me some curing salt. So, in about a week I'll be ready to smoke fresh bacon! Crazy excited and can't wait to try it. I'll also be posting a step by step Instructable as soon as it's ready for a taste test.

Friday, July 16, 2010

Huaraches

Recently had a conversation about huarache sandals and after looking into them decided they were just too simple to not try them.

They were easy to make and far more functional than I expected. Though, given that people run radical distance races in them it should have been a given. A bit tricky to tie but other than that they rock.

I used leather rather than the currently popular Vibram sole material. I also used paracord instead of something softer. This was supposed to tear up my feet but it works just fine.

Hiked around San Francisco, out and about in the bay area and on trails near Scottsdale Arizona all with good results.

You can check out this Instructable if you'd like to make your own!

http://www.instructables.com/id/Minimalist-Running-Sandals-Huaraches/

Friday, July 9, 2010

Publication in Elephant Magazine!

Seems these magazines are a bit tough to find in the States but have a look the next time you are at your favorite NYC bookstore for the summer issue of Elephant Magazine. It's a great art magazine and the current issue even has a four page spread with six of my images and a very nice interview. I'm more than pleased to be a part of such a great publication!

I'll post a couple photos as soon as I get a chance to upload but here's a link to the magazine website.

http://www.elephantmag.com/

Wednesday, June 30, 2010

Over at Instructables

I'm finally settling in at Instructbales.com and needing to post some of the things I've been doing here as well. Likely just some photos and a little more personal description of what I'm up to with a link to the step by step instructions.

One thing especially rewarding for me has been rebuilding carbide lamps and getting something posted online for others to access so these great little "machines" can live on. I learned about them many years ago when my awesome uncle introduced me to caving. I have fond memories of exploring a certain southern Indiana cave where Teddy Roosevelt left "carbide graffiti" on a cave wall. We used battery powered lamps but it left an indelible impression on me and a quiet fascination with old carbide miner's lamps.

Now I've been able to bring that to a less quiet level and rebuild a couple fairly derelict examples and see them come to life!

If you are curious or even better, have an old lamp sitting around and want to resurrect it check out the Instructable for a fairly in depth how to on rebuilding and repairing them. It's everything short of re-sealing a breached carbide chamber or re-braising broken joints and if you can do that there's nothing you can't fix on these cool old lamps.

http://www.instructables.com/id/Rebuild-A-Carbide-Lamp/

Monday, May 31, 2010

Photography Show

I don't think I have mentioned much about my photography in this blog but I wanted to share that I'll be participating in a group show in Hong Kong that opens August 22nd this year. I won't be there but my photos will.

So, if anyone will be in the neighborhood I'd love it if they dropped by and let me know how things went!

I'll update with the address as soon as the next step in the process is confirmed!

Thursday, May 13, 2010

Modern Stone Age 2

In an earlier post I wrote about a project making "stone" tools from chunks of quartz glass. My thinking was, and still is, that using quartz glass is about the best material for making these tools. The concoidal fracture pattern in both man made glass and volcanic glass, obsidian, makes for incomparably sharp edges. While not the most durable they are arguably the sharpest blades around. As it becomes more of a reality I'm growing all the more attached to the idea of producing a conceptual art project that brings stone age and space age at least in some way full circle.

I finally got my hands on another, and larger, piece of quartz glass. It's not space industry salvage but it's a good starting place to hone the needed skills to use that salvage material if I can manage to acquire some. The piece I have looks like it is a cutoff from manufacturing some sort of large round lenses.

If anyone works for a glass manufacturer or the space industry, I'm still trying to source a piece of quartz glass from an observation portal!

Wednesday, May 12, 2010

Make A Drop Spindle


For my first Instructable I decided to do a how to guide for making the drop spindles I wrote about in some recent posts. So, now if you want a step by step guide to making your own you now have it! 


I've gathered more fiber recently and now have new motivation to re-hone my craft and get spinning. I'm hoping to be up to speed enough soon and able to put together another Instructable showing how to do that as well as washing and carding fibers. I did recently attend a sheep shearing where I was able to re-visit some things I had forgotten and hopefully improve my spinning. 

Please do have a look at the Instructable even if you are just curious. 

If there are any questions or comments or offers for a spinning workshop or three, please contact me here or through Instructables. 


Wet Caligae

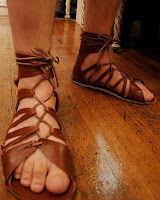
Hiked cross town(San Francisco) in the caligae. Not all that far but a few miles anyway. As luck would have it, the walk home was in a pretty decent downpour. It was even a cold day so I was wearing thick wool socks and got a great window into wet weather usage.

While I was moving my feet stayed warm even with the wet socks. While I was soaked through to the skin I wouldn't say the soles of the sandals were saturated and my feet didn't slide around at all. Not sure if the lack of sliding was due to the wool or just that it was still sort of dry under my feet. Either way the caligae didn't stretch or lose shape as a thought might happen and I can say they passed the wet weather test pretty well.

Once they dried out I think they may have actually been improved by getting wet. They certainly molded more to my foot shape and they seem to have shrunk in all the right spots. They also dried slightly more rigid than they were. Had I used a thicker leather that might be undesirable but as noted before this pair was made of somewhat thinner material than the historic examples I've seen in museums and books.

This will be yet another chunk of good information to consider for the next pair.

Instructables.com

If you have yet to discover www.Instructables.com you no doubt be pleasantly surprised and can plan on spending a few hours(or days) taking it all in. It's a fantastic community of DYI minded folks doing all manor of projects.

One of those people is now me! I signed on as editor and started a couple days ago working at Squid Labs. So, some of the projects I post on here will now have companion how to instructions, or "instructables", over at the Insturctables website. I'll be sure to post links so anyone who is interested can see how to do their own versions.

It's also a great way to compare notes and get the help of countless experts. So, don't hesitate to make duplicate projects or comment on the ones you see!

Sunday, April 4, 2010

Badgerific Anvil

One of the more unusual things from my past is that I was involved with a living history museum during my teenage years. In the course of volunteering and eventually working there, I spent several years as an apprentice blacksmith. I didn't apply for my journeymans card, wish I had, but did learn a lot and carried on an all but lost family tradition. According to my grandfather, he was the last of five generations of blacksmiths in the family before the trade fell on hard times and he and my great grandfather found new ways to make a living. So, my adventure worked well for everyone. Grandpa was proud and happy and the museum had what was left of our family tradition as a resource. I have always at least dabbled in metalsmithing regardless of having a smithy to work in and am tentatively planning a few classes at the very cool Crucible in Oakland some time this summer. I would love to resurrect and confirm my skills with an official journeymans card but I have no idea what that takes these days.

I hadn't realized how much I regard anvils as standard shop tools until fate dropped an almost unused Badger anvil into my care. Though, as luck would have it, the one I have is sort of a one of a kind example from when Vulcan bought out Badger. The experts tell me it's somewhat of a museum piece. So it won't be seeing any type of use that might threaten the fragile paper decal. Badger anvils are all but non-existant these days and this transitional example with a paper decal is possibly unique. Lots of anvils got melted down during WWII as part of the war effort. Not that there are a lot of anvil collectors out there but for those that are, some older models are scarce.

I'd forgotten how often I used to cold work things to straighten, flatten or bend them into correct or more useful shapes. I do have a torch but I'm fairly certain the neighbors wouldn't appreciate the noise or the fire hazard. For now it's just nice having an anvil again (When I moved cross country to San Francisco it wasn't exactly high on my list of things to bring.) and as mentioned above I'm not of a mind to degrade the Badger's condition. So I'm still on the hunt for an anvil but for now I have something to remind me why I want one.

Saturday, April 3, 2010

Ordivician Monsters

Pre-historic critters are, in a word, "awesome" and there was a lot more running around out there than dinosaurs and their pals that get lumped in with them. For me, some of the most fascinating are early Cephalopods that arrived on the scene in the Ordivician and Silurian periods. These eventually diversified and became everything from the Nautilus to Octopus and Cuttlefish. These animals are interesting in and of themselves but are made even more so by allusions to gothic horror creatures like Cthulu. I'm also pretty fascinated with model making, prototyping and generally just playing around with natural history.

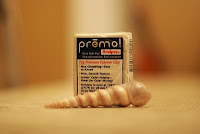
Like most people, at some time or another, I have picked up sea shells and carried them home. While I'm aware that those cool looking ancient Cephalopods are long gone I often imagine auger shells and ceriths as being left behind by them. So, why not make those imaginings more tangeable?

I'm a big fan of polymer clays Sculpey. They some in a wide range of colors and types and are easily cured by baking in a conventional oven. Even with wide and varied use by crafters of all kinds I think it's an underutilized medium that offers endless applications. More use seems to center on the decorative possibilities but there is a world of practical application as well. In this case it's decorative and structural in terms of being able to turn the Cephalopod model into a pendant.

This was a lot of fun and got me rolling on a couple of other projects I'd been meaning to tackle like making a drop spindle . I contemplated buying one or using more expected materials like wood but I'm big on adapting and cross applying what's on hand as well as just exploring making things in new ways out of sheer contempt for dogma.

Note: These are intended to be more on the fun side than accurately represent an early Cephalopod but they are fairly close anyway.

Thursday, April 1, 2010

Hey, it's yarn!

The new drop spindle works better than expected. I went ahead and added a metal hook after all to make it easier to use as a top whorl spindle. It isn't necessary for a bottom whorl set up and really, I guess there's no reason you can't jut flip one over to use it one way or the other. Not sure why they are even sold as one or the other now that I think about it.

There are spinning style reasons that might make you want use one type or another. In my case I learned on a bottom whorl spindle but that's not what I'm most comfortable with.  Practical reasons might be that top whorls are sometimes thought of as easier to use unsupported but again it's not critical. You really just need the thing to spin and make sure your fiber can handle the weight of the spindle taking into consideration that it will of course get more heavy the longer you spin. The photo shows my new spindle with only a few yards on it but it adds up in a hurry once you get going.

I also didn't have the money to spare for commercial cards so I substituted a couple of standard pet store dog "slicker" brushes. They work fine at a fraction of the cost. I may also build some combs if I keep spinning. It'll all depend on how it adds to my life. I'll give most things a go at least a couple times but there's just too much to experience in one life to devote a lot of time to something that doesn't make a positive impact on how I live. In the past spinning and the consequent interactions with knitters and weavers were definitely a good thing!

The mohair didn't smell until I put it in the first bath to wash it and then wow, talk about a wet smelly goat! It was still a lot of fun and I'm looking forward to washing the rest of the fleece and giving it a go. Jumping back in with the long fiber goat hair was probably not the best idea I've ever had as it can be tricky to spin. More tricky than the lambs wool sitting on the floor next to it anyway.

Now I want more fiber and am looking forward to making a couple more spindles. Making the whorls with polymer clay opens up a world of function and style options I can't wait to explore.

Saturday, March 27, 2010

Spinning Yarns

No, not story telling but actual yarn! When I was a teenager I spent thousands of hours volunteering at a living history museum and then thousands more working there. Among the many skills I learned was "spinning". I'm not sure if the adults kept us spinning yarn to avoid idle hands but it made for great demonstrations for visitors and provided the resident knitters with skeins of "homespun" or "handspun" as it's sometimes called.

There were spinning wheels on site but I preffered to use something called a "drop spindle". It's basically just a stick or shaft and a whorl and may or may not have a hook on one end. The whorl is usually a round disc made of wood that serves as a weight to help spin the shaft. Think of it like a long skinny top. Some styles lack the whorl and are just a tapered shaft that is heavier on one end. It is possible to spin on just a plain stick, a pencil or even a ball point pen. You just need a rod of some kind to "spin" so you can put "twist" into the yarn. I'd bet you could even spin using just a whorl if you wanted to. There is a lot of room for improvization.

After a very long break I realized that I kind of miss spinning. I have yet to learn to knit or crochet but homespun is often attractive enough to knitters that you can trade a skein of yarn for having them knit something. I really like the idea of having a hat and scarf knit from yarn spun by my own hand. It's also something that is highly portable. You can drop a spindle and some fiber in your bag and never feel like time waiting in line or sitting in waiting rooms is wasted.

Another interesting thing for me is the thought of spinning unusual fibers into yarn. Using wool as a carrier you can spin almost any fiber from animal hair to cotton and other plant fibers or synthetics like polyester. I don't know enough about knitting to know how you might use it but I have even seen paper spun into yarn. That's of course ignoring uses beyond knitting.

While spindles of many kinds are commercially available I decided to just make one. There are lots of ways to do this including stabbing a chopstick through a potato. For this one I am using a large bamboo chopstick but rather than a potato, formed a whorl from polymer clay. It's set up so that a rubber band looped a few times around the shaft above and below the whorl hold it in place. This is so that it can be easily removed and used as either a top or bottom whorl spindle. Either way works well, I just like having the option. (When assembled, the whorl was a snug slip fit and doesn't currently need the rubber bands.)

As far as something to spin goes, I have a family member who raises goats and it's possible to find wool on eBay for as little as 99 cents an ounce. An ounce of wool is actually a fair amount and there are tables available online to calculate how many ounces of wool/yarn it takes to make a piece of knitwork. So, I'll start with that and see where it goes! (Processing wool for spinning is a whole other game. Maybe another post...)

If anyone in the bay area wants help shearing sheep let me know. I'd be inclined to come help in exchange for some wool!

Wednesday, March 24, 2010

I heart kites!

I have been a kite addict ever since I was a small child and my uncle made a kite for us out of a blue paper shopping bag complete with his very own hand rendered Mickey Mouse drawing. It was fantastic! I remember how he carefully cut out the kite, drew Mickey and glued the edges in place over the string. I even recall digging through my grandmothers rag bag to get an old shirt to tear up for the tail. It flew beautifully and I eventually got to climb to the top of a tree I was normally warned off of to retrieve it. (I was the only one light enough for the small branches to hold.) Since then I have built a number of kites and have a collection of a dozen or so that I still take out regularly. I've been known to drive hours out of my way to visit Kaleidokites in Eureka Springs Arkansas. It's an all time favorite kite shop hidden in the Ozarks, another all time favorite.

Lately I've been fascinated with the idea of kites as both an emergency sail for sailboats and as a possible way to propel a power boat either as an emergency measure or just to avoid using fuel. One innovate company doing amazing things is California based Kiteship. They have been in the traction kite game for quite a while now and are doing incredible things with boats and kites. They've also popped up over at Instructables in chapter 12 of Tim Anderson's incredible free yacht saga.

As part of my own saga to eventually own a boat and with the possibility of yet again cross pollinating and combining more than one interest and  doing something practical, wow, I'll be keeping my ear to the ground and surely exploring this one more down the road.

You can see another article on kites I wrote for my Bay Area Dad blog here.
http://sfbaydad.blogspot.com/2009/07/activity-go-fly-kite.html

Saturday, March 13, 2010

The Mechanical Mayhem Continues...

Wow, I'm all about making this motorcycle project work but it's turned systemic and it's one thing after another now. The gasket I made works great, got the new battery installed and made sure the points and condenser were dry using a hair dryer but there's still no spark. The most odd part of this is that it just sort of went bad sitting there. I'd understand if the thing was being run hard or even just run. Maybe points are just that finicky.

Borrowed a couple tools I needed and will boldly dig into the next scary unknown bit. It's not that big a deal but it's once again new territory for me. I read about it, asked people in the know and watched some videos, not much left but to just do it. (I'm a big fan of due diligence on just about everything.)

Worried that when changing the bars I may have grounded out the kill switch wire. That'd make sense if the ignition cover didn't have so much water in it. At least I have the most likely parts needing to be replaced and all but a couple tools. A little intimidated by the timing adjustment as well since it requires pulling apart yet another chunk of the engine but I guess it has to be done...

Wednesday, March 3, 2010

Modern Stone Age

I love "slag" glass! I think that might be a regional term for it but people who are into it usually know what you're talking about if you say it. It's those, often large, hunks of glass that people use to decorate their yards and fish tanks. It's beautiful looking stuff but there are other uses too.

As an undergrad I studied archeology at Indiana University where our program involved a fair bit of experimental work. If you are looking for stone tools and "debitage", aka leftover stone bits, you may greatly benefit from knowing how those thngs are made and what a fresh tool making site looks like.

At some point I questioned the wisdom of making these experimental tools from stone as you run the risk of creating spoof arechology sites and really mucking things up down the road. One sollution was to toss modern coins or bottle caps in with your leavings so that anyone digging them up down the road would know it wasn't a native site. My personal solution was to use colored glass instead of stone.

You get some way cool looking tools and there's no way to mistake your stuff for anything but what it is. The glass a great material to work with and it's fairly close to obsidian which is just about the best natural material you can get.

I'm looking for a grant to do more of this work for a mixed archeology and fine art project to demonstrate another way fine art and science can cross boundaries. The large point pictured(in progress) is made from quartz glass. This type of glass is used to make things like binocular lenses and space shuttle windows. I really want a chunk of shuttle window to make "primitive" tools with! So if anyone knows where I can get one let me know!!

Also, if anyone is willing to give me a primer in grant writing I'd be more than appreciative!

Monday, March 1, 2010

Adventures In Motorcycle Mechanics: Wet Points

After figuring out that the ignition cover gasket had failed on the DT I decided I'd fab up a new gasket rather than just buy one. The bike is already about 35 years old and parts are getting harder to find as time goes by. Most things can be had on eBay, especially if you get an exploded view parts list so you know what to call the parts. In the case of things like this simple gasket I feel like it's wise to explore making your own. There are several reasons for this.

For one you get them as fast as you can make them. No scrounging or waiting for parts to arrive in the mail and no worrying if you ordered the right one. If it doesn't fit you alter it. If you see an area for improvement you can do that. So, for me the added effort of plotting a pattern and cutting one ends up being better than buying one. Another good reason to make as many parts as you can is that you can effect repairs anywhere you might find yourself breaking down. In the case of this gasket I did save money but only a dollar or two. If I end up using the remaining gasket material I'll increase the savings. Even a one more repair would better than double the value.

In the case of this gasket the bike failed in my own back yard. No big deal but had it failed out on the road things might have been different. For future reference, I now know what to do if this ever happens again no matter where I am even if I can't get the "parts". To be sure there are many things you simply won't be able to make yourself but the more you can the better off you'll be. Not to mention that in the coming years as fewer and fewer mechanics are willing to work on this bike and the parts become even more scarce this is one less thing I have to fret about. This gasket is more symbolic in that effort anyway. It's just a weather seal and while the failure of the last one killed the bike it's not all that big a deal.

I've also made a simple trace of the original that I'll label and tuck away in my repair manual. You can bet I'll be keeping a piece of gasket material in my tool kit from now on. Incidentally the leftover disc from the center of the ignition cover is big enough to make all of the gaskets for a carb rebuild!

We'll see if it was a successful cleanup later when I install the new battery and try to kick it over. The points looked good and now they're dry and protected.

(I did consider Permatex for this job but I wanted something cleaner and I want to be able to easily pull the cover again if I didn't get things dry enough the first time. Or worse, if I need to replace the points, condensor or magneto.)

Plenty of great ideas came from this repair. It's times like this when I wish I had more resources to venture into start up territory. There's more than one opportunity here.

Sunday, February 28, 2010

Boblbee Backpacks

Two things I really appreciate in the "stuff" I own is the ability to be repaired if it breaks and the ability to be modified or customized. Though, I'm not necessarily a customization fiend, especially if the modification compromises function. One item I have had for years that seems to really embody that ethos is my Boblbee backpack. It's an early silver Megalopolis I bought in Japan more than a decade ago right when they came out. It's survived just about every environment imaginable and come through like a champ. Air travel literally took a chunk out of the shell the one and only time I checked it but other than that it's been great.

It keeps my delicate camera gear safe and actually makes me feel a bit more safe as well. A weird and disturbing thing pickpockets were, probably still are, doing was slashing open travelers backpacks while they were on their backs and then making off with whatever fell out. Good luck with a hardshell. It also sheds water pretty well until the top gets really soaked. A rain cover would solve that but I never bothered.

When they first came out the design wasn't patented and it was just the name that was protected by copyright. That led to at least one company making a near identical knock off still available today. The Ergo Tech copy of the Megalopolis was initially pretty close but quickly fell behind as it's production was cheapened and the Boblbee improved. None the less if you want something close with a substantially lower price tag you could google them up and find one. They show up on eBay sometimes. If you do decide to go that route the add ons and parts are interchangable on the early models but I don't know about later Ergo bags. The Boblbee was essentially designed right the first time and hasn't needed to change much. Though, if you are like me, you'd get the cheap copy and not be satisfied until you had a legitimate Boblbee.

My veteran bag is finally showing some wear on the harness and I've slated it for an overhaul. You can get parts from Boblbee or you can find them with a simple web search. Some companies offer custom painting options but any automotive paint shop can match a shell to your car, bike or scooter. While my silver bag does look a little too much like a Paris Metro trash bin, yeah that was weird, it also easily matches helmets and doesn't clash with the various vehicles I've had over the years. (Friendly FYI, that isn't my image but rather one from a Flickr user. I'd have named them but they use a symbol instead of their name.You can see their photostream here.)

One word of caution, it is not the most aerodynamic backpack you will ever own. Boblbee markets it for motorcycle use but the shape lends itself to a lot of drag at more than about 35 or 40 mph. It was a real surprize for me the first time I accelerated up to highway speeds on a ramp and had the bag yanking me backward. I've never experienced that with any other backpack and while you can account for it and "get used to it", I'm not sure it would ever be very safe. Luckily the bags easily strap down to seats and tanks where they aren't a problem at all. I do wonder if I had a different style of harness with a more convex shape at the top if it might solve the problem. Though the overall shape is a lot like the familiar airfoil shape we see on all sorts of wings, aka "lift surfaces".

All in all I still think it's a great backpack and the range of add-ons and options is without peer. Considering how long mine has lasted it seems well worth the somewhat high price tag.

Images via http://www.boblbee.com/ and www.flickr.com/ Original URL's of images linked and may be seen through images properties.

Fixie

It's probably hard to not be a bicycle enthusiast while living in San Francisco. I've ridden all kinds of bikes over the years but have been mainly a mountain bike guy. There is a single reason for that, I lack finesse on a bicycle. Hard charging, hanging on and playing rough, no problem. Not flattening my tires because I wasn't looking out for road hazards and minding curbs... not so much. I developed my break neck style mainly over one summer in the 90's when I just kept upgrading bikes until they stopped breaking. I still ride the survivor. A now somewhat vintage, rigid frame, Specialized StumpJumper M2. I did have a much newer Canondale and a fun 1952 Schwinn Spitfire but someone decided I no longer needed them. No worries, life happens right? Well, the time has come to put a little diversity back in my bicycle stable. Even though the "fixie craze" is going mainstream, that'll be interesting, in true bay area style I'm adding a fixie to the mix.

I do have my doubts as to fixies ever really going mainstream. The "masses" don't typically adopt things that take a lot of practice or discipline and from everything I've seen being a fixed gear rider takes both. Though, we might see a lot of bikes at rock bottom prices being sold off by people who thought it was a good idea. It may indeed be to "extreme" to go mainstream. Either way...

I'm using an old Giant with a lugged steel frame for the build up and going with a flip flop hub rather than just a fixed gear. No dilusions about powering around never needing to coast a little. I'll also hold off on the oh so extreme "no breaks" style that gives you a slick looking clean bike but not so much in the way of emergency stopping power. Just doing a basic bike on the cheap unless I get the bug to make it interesting and grab some fab parts from some of our local bike builders or maybe spec out some pieces to a machine shop. Mission Bicycle has given me good advice so far and they've got a lot of shiny things just waiting to be brought home and bolted on. For custom parts, even if we didn't have great machinists in San Francisco there's always eMachineShop or any number of other "online" machine shops. Just something cool about designing, uploading and then getting "your" parts in the mail. I'll post again as the parts arrive and I begin the build. Should be nicely timed with the tail end of my motorcycle project!

Image via http://www.cytexusa.com/ 

Friday, February 26, 2010

A Cabin in the woods...


Since before I can remember I've thought it would be incredible to live in the "woods". The concept has taken on various forms at different times but the more communication technology progresses the better the idea seems. Unlike the most common version of that fantasy, one of my hedges against doing it has been not wanting to be a hermit.

I never wanted to be totally cut off from the world. I like people, cities and especially coffee shops. I'm getting pretty solid with my own coffee related creative urges but that's another post... In short, as long as I could maintain some form of web access, fairly reliable shipping and somehow make a living I'd be alright with lving in some version of the wild that is close enough to civilzation to get regular urban interaction and expect regular visitors.

As I've learned and developed more skills this lifestyle seems more and more possible. An obvious missing link in my skill set is knowing how to build a log cabin and what kid hasn't thought building, or at least living in, a cabin would be awesome at some point in their life?

The thought occured to me that thousands of settlers did it without decades of experience and training so it can't be all that hard. There weren't droves of cabin contractors on the American frontier and while safety and health concerns are worlds improved, so are the methods and finishing materials available. As it turns out there are a number of cabin building schools out there and they don't even cost a fortune.

Great Lakes School of Log Building has a ten day course priced at $1,150 and a stone masonry course at $750. That seems doable even if you are working a full time job. "Giving up" a vacation to learn one more way to make your entire life more like a vacation seems pretty worth it. That's also less than most would spend for a week in Vegas or some other poshy fun place. There are other costs involved but even at three times the course fee you'd still be doing well. On the other end of the spectrum is a twelve week course in Indiana for about $5000 William M. Lasko School of Log Building. Having a look over at http://www.loghomelinks.com/ almost anyone can likely find something in their budget and relatively accessible. They have links to other things as well, land, furniture and contractors if you'd rather hire it out.

To be fair, I did spend about eight years volunteering and then working for a living history program in Fort Wayne, Indiana. I logged thousands of hours in a "log cabin" style environment and, while I never built a cabin, there are likely skills and experiences related to this type of architecture that I take for granted or think of as more "normal" than they actually are. Never the less, for the motivated individual(s) it's doable!

Now all I need is a grant/scholarship to document this historic art!

...and I still think Lincoln Logs are awesome.

Image via http://www.drtoy.com/

Thursday, February 25, 2010

Adventures in motorcycle mechanics

I'm a motorcycle guy, not a biker per se but I've had motorcycles and scooters since I was a teenager. I've worked on them on my own most of the time with welcome advice from friends and family in the know. It's admittedly become part of my identity over the years and I feel sort of awkward and out of sorts if there isn't a bike with my name on it near by.

Like my cars I prefer my bikes to be of the older sort. I do like newer bikes but the fun ones within my budget constraints are more often than not vintage bikes. Not too long ago I bought a great old Yamaha DT 250 enduro with my father in law. It was a great find, a for real Arizona "barn" bike that had been sitting around for ages. Everyone hopes those sorts of things will be stories that involve some fresh gas and a new battery and off you go. Not so much this time but far from as much of a project as it could be.

The main difference for me this time is that I have to call people or email for advice and I'm pretty much on my own fixing it. That's been a good thing and had provided some welcome "therapy" time. So far it's gotten a battery, oil seals, tires, seat cover, cafe bars and a new tail light. Some of that wasn't necessary but I like the look of cafe racers and flat track bikes and since it was nice but not minty concourse original I went ahead and made some changes. It was running great but when I tried to move it I noticed the clutch had gone a bit wonky.

After quite a bit of trouble shooting I figured out it just needed a new one. I got a new clutch assembly and the gasket for the cover but decided to try to limp it down to the DMV to confirm the VIN and get the plates on it. No, I have no idea why I would do something that addle brained. In any event, the old girl thought it would be wiser to just stay home and refused to start.

So, now I have a "real" project on my hands. I'm invested now and at that "Oh, yes. I will do this." stage. Determined my problem to be soggy points this time. Going after gasket material to be a real DIY sort of guy and just fab up my own gasket. It's just the gasket for the ignition cover so I'm hoping it won't be that big a deal. We'll find out!

Wrench in hand I'm wading in to new territory with the clutch and I've never needed to work on my ignition before other than adjusting timing or swapping out electric ignition parts. Either way I'm determined to be on the road soon. I'll try to snap a few images of my mechanical exploration as it proceeds.   

Wednesday, February 3, 2010

Hacking Solar

Portable solar rigs like those from Voltaic and Reware are truly cool. As are smaller gadgets like the Solio and things with built in charging systems like the LightCap. They also tend to be expensive. With solar cells becoming increasingly ubiquitous and cheaper every day, it's easy enough to scrounge some up and build your own portable solar projects.

If you are using pre-made solar cells the tech is pretty simple. You can make your own cells but I wouldn't recommend it. So, find some cells laying around and dig in. It's just basic wiring and relatively safe DC power. There isn't all that much to it. You can buy photo-voltaic cells on the web and at places like Radio Shack or reclaim them from broken road signs, yard lights or every solar powered calculator in your neighborhood dollar store. Maybe ignore that last option... unless you really like to do delicate soldering.

I got some great polycrystaline cells from a Volkswagon dealership! They were shipped with the cars to prevent the batteries from going dead from factory to dealership. They are designed to plug into the OBD2 diagnostic port. In this case, two of those units live on and get used far more often than they were intended. Poly-crystalline cells have a lot shorter lifespan than the more expensive mono-crystalline cells but even if they conk out after 4-5 years of continuous use I'll be in good shape. I don't use them constantly anyway. Ultimately they are good for simple apps like portable solar but maybe not so great to cover the roof of your house. As far as I can tell these are meant to be throw away cells once they reach the dealership.

Cars should probably all have this tech built into their superstructure anyway. Even if consumers don't like the look it's not difficult to hide functional cells in plain site as trim and accent pieces. Either way, the consumer will like the added feature of a self tending battery that charges while the car is off. It also makes sense to be able to continue to put a small amount of power into a car battery even when the engine has broken down. It could be used to power hazard flashers, the radio or possibly a socket plug to charge a life saving cell phone... but back to the project at hand.

Once you have your photo-voltaic cell you'll need to make sure it has a couple of wires (leads) coming off so you can put it to use. If it doesn't you may have to gently solder some on. This is delicate because it's easy to damage cells with the heat from a soldering iron. So, be gentle and be quick. Some cells may have an intimidating looking dog ear plug or other complex contraption sticking out of them. Fear not, there are still just two wires inside that thing coming from the cell itself.

You may want to grab an ohmmeter, put your cell in full sun and see what kind of power it's putting out. If you feel it's too much to risk your MP3 player, cell phone or game gadget you could wire in a resistor that will limit the power going to the device. This is probably not necessary but that's a decision for you to make. You can buy resistors or pull them from old electronics. It will take quite a solar array to charge something even as small as a laptop, so in most cases this will just be overkill. The point I'm making is that solar is often so simple even someone with relatively no electronics skills or education can put together useful projects.

I got lucky with my ICP Solar Technologies cells because they already have a battery charge controller installed. I also have solid specs on the output (Voc: 23V, Isc: 296 mA, Pmax: 4.3W, Vmp : 18V, Imp : 240mA) but it's not all that important for my application. So, in this case I just lopped off the offending OBD2 plug and wired in a lighter socket from Radio Shack. This allows me to charge anything that you could charge with a standard car charger. I've charged my PDA, iPod, camera batteries and even manged to charge my vintage Sony Vaio (an early PCG C1X). The set up easily straps to a messenger bag, backpack or the top of a stroller, yet another item that should come equipped with a solar charging array.

If one of the major issues with going solar is that it won't scale to power the grid, then maybe we should look into abandoning the grid? It's a good time to go out and hack yourself a portable solar rig!

Note, the photo is of an identical unit produced by ICP for Nissan. Image via http://www.earth2tech.com/

Friday, January 29, 2010

The Oberlin Shoe

I am the proud father of a lovely two year old girl. A two year old girl with wide feet and a high arch. Before she was walking she had the chunkiest little feet imaginable. So chunky it was sometimes hard to find shoes for her. Especially cute shoes for special occasions. The obvious answer was to develop a design that would work for her foot! A little over a year and many dozen pair of baby shoes later Oberlin Atelier has emerged.

The shoes are simple and designed to fit a range of little feet. They have a soft leather sole and a soft leather upper made of cow hide. The style is a hybrid of contemporary and historical meant for both girls and boys. They come in a range of colors with custom orders available. The leather they are made from is mainly from Edelman Leather. It is made with hides harvested from the food industry and tanned using eco-friendly processes. As the shoes are tiny, I am able to use cut offs and left over pieces from upholstery shops. This means less waste all around and extends the product lifecycle of the leather.

I'm certainly learning a lot about production, distribution, sales and a million other entrepreneurial skills as well as how to live with a startup in your apartment (It's fantastic).

Currently each pair is hand cut and hand stitched. You can check them out on Etsy!

Wednesday, January 27, 2010

Exploring Entomology

I'm a fan of entomology. It's been a lifelong pursuit that I have studied on my own as well as up to graduate level courses. I have collected in the United States (including Hawaii), Canada and Japan. One of the most interesting and entertaining things about studying and collecting is "pinning", the art and science of prepparing and spreading specimens for display.

It can be challenging and entertaining with some really interesting results if you are into that sort of thing. Even when done well specimens can be fairly fragile and prone to being eaten by pest or even being infested with molds and fungi. Though, if diligently cared for, they can last indefinitely. One of the comparatively newer preparations is sealing specimens in blocks of clear resins. These look great and offer an unprecedented level of preservation but lack a certain elegance. For scientific study sealing them off also prevents certain types of close examination and sampling.

Pinning is often more art than science but I have used my specimens to study for classes more than once. With the insect pinned out so that all of it's structures can be and seen it's a lot easier to see those structures but how they function as a whole. My methods are admittedly a departure from the standard scientific and artistic canon. I don't like to mount through elytra and wings but, if not handled well, not doing that can lead to fragile specimens splitting or breaking. You need to be patient, gentle and pay careful attention to what you are doing as the specimen is reacting to your push and pull. There is a wealth of information about this subject that can be found on the web and in libraries and book stores everywhere.

While not for everyone, many people will find it fascinating and many more will at least appreciate the end result. Insect pinning supplies are readily available online or in stores. You can often take classes at museums or through your local extension office. Studying Entomology is rewarding by itself but also has great implications for cross application and providing insights into everything from robotics and advanced materials research to renewable energy and understanding emergent behaviors.

Friday, January 15, 2010

Caliga Caligae

At some point I got interested in Roman sandals. The kind that shod the feet of legionaires as they marched all over the empire. Caligae, as the Romans called them, are those familiar leather sandals we know from countless movies, paintings and statues. I ended up reading a lot and looking at a lot of those countless movies, statues, paintings, mosaics and historical artifacts.

I talked about them, wrote papers (and articles) and made a pair to tromp around in and ...write about. They are surprisingly comfortable and pleasant to wear but the first pair aren't quite what a legionaire would have worn. That is to say they are historically "possible" but defintitely reflect the materials I had on hand and my distilation of historical design aesthetic. So, I'll be making at least one more pair at least somewhat closer to the originals.

The initial pair, started with a single question, what was it like to "live" in these sandals?  So far they have survived a fair bit of paved city walking without any blisters, or signs of real wear after more than 20 miles of walking (with 30 lbs + on my back) and without losing many of the cut tacks I substituted for hobnails. This is a lighter load and not much walking when compared to even a typical Roman citizen let alone a soldier on the march but I'm calling it a successful proof of concept.

How was it to make some? It turns out, not all that "hard" per se but far from easy. Uppers are cut from a single piece of thick leather then stitched and sandwiched between even more heavy sole leather. The orignals  had funky hobnailed soles the more closely resemble today's golf shoes than military footwear from today. There is also quite a bit of evidence to suggest that this style may have been somewhat regional.

Where the heck do you get reproduction Roman hobnails? Answer, India. Or you find a guy who imports them, put in an order and wait for a very long time. In the end it's sort of like getting a gift because you wrote them off and half forgot you ordered them. "They're on Indian time." Ok, I can wait. I always seem to have too much to do anyway. I did finally recieve them and I have a more appropriate sole leather as well as some really nice stuff for the uppers.

In making the first pair I learned a lot, especially about process. In pre-industrial conditions things are simply made differently. Beyond the obvious making by hand there are other factors to consider like, how do you "mass produce" an item without knowledge of mass production methods? You can still do it but again, the focus has to be on process. With pre-industrial production the order in which you not only assemble but even make the pieces becomes in some cases critical. It's hard to make a pile of identical parts that will fit with another pile of identical parts when it's next to impossible to actually make them "identical". There are patterns and they were certainly used but in many cases it's more about the method. I do have some experience with this sort of thing from blacksmithing but I'll save that for another post.

Think of it something like this. Make part A. Make sure it fits or is as close to the foundational piece of your design as possible. In this case it needed to fit my foot. Then make part B and to fit part X and fullfil whatever other design function it needs to. Next make part C so it fits A and B and on and on until you are finished. If you make a pile of part C with no A and B to fit it to, when you finally get around to making A and B you'll probably have a lot of adjusting to do to make things work if it works at all. I think I kind of got the process right for the caligae but I'm sure I have some things to figure out before I use my hard won hobnails on the next pair. The big lesson here is that in a pre-industrial environment everything is somewhat custom and needs to be treated that way. It is at best extremely time consuming to make a batch of components within tight enough tolerances to reliably fit batches of other equally varied components. In some cases your end product is better due to this process byproduct we can call customization. I'm also pretty sure I can account for some design elements of examples in the archeological and historical record that suggest a need for real mass production and how that production level was attempted.

I also learned a thing or two about fit from actually hiking around in my first pair and I'm calling it aexperimental archeology at this point. I actually do have a BA in anthropology and this project has produced a couple of scholarly papers. Along with the fit I'm pretty sure I can identify where popular reproductions used by re-enactors and filmakers got it right and sometimes wrong. The next phase, as time permits, will be looking at the practical limits of this type of shoe. It's no coincidence that we have so many shoes from companies like Teva, Keen, Merrell, Birkenstock and numerous others that very much resemble Roman sandals. They are a lot more durable than they may look but they are definitely from a time before cement covered the earth. There were "paved" roads in ancient Rome but not quite like we have today.

Amusingly, I learned that they sound cool on stone floors. Yeah, I know, that was taboo in Rome too. Without the historically correct hobnails you can pretty much get away with wearing them anywhere. Though you might still want to avoid places with metal detectors and easily damaged floors. The metal detector thing usually ends up just being funny, "I'm sorry for the confusion officer. I'm doing a study of ancient Roman sandals." Another thing I learned is they are even practical in cold and snowy weather if you add some wool socks. This is something that is somewhat contentious among historians and re-enactors but like so many other things, the evidence is in the doing. You can only learn so much sitting in a lab, office or study carrel.

All in all it's been fun and I think with maybe one more pair I'll have satisfied my curiosity. They've already contributed to my grad school experience and taught me some things I can apply to my company making shoes for toddlers as well as answered some questions that hadn't been dealt with very well in the research canon yet. So it's been more than worth the time and effort.

I'll be sure to post again when there are any developments or misadventures worth mentioning. I'll also post an excerpt and link(s) if I publish the scholarly work. In addition to another more historically correct pair I'm hoping to wear them on a hike in the wilds of northern California to take the experience to the next level.