A while back I wrote a post about a project I did at Instructables.com putting together a carnivorous plant terrarium. It was fun, it looked great and it was a much bigger learning experience than I could have imagined. I learned about the plants, terrariums, the soil for those same plants that is certainly on the tricky side as is the water. It mostly just needs to be as "clean" as possible, meaning both chemical and nutrient free. Dissolved mineral content in soil and water will readily kill otherwise healthy carnivorous plants. This is probably why they are a seasonal or temporary curiosity for most people. A few months in and the plants mysteriously die or for other seemingly unpredictable reasons they do fine and keep on going. Even educated growers often experience difficulty rearing these finicky bug eating wonders.
Someone over at Instructables commented recently asking about lighting. I don't think I really addressed that issue in my how to or the subsequent how to on soil for carnivorous plants. Mine lived in a big jar in a sunny window where they had bright light most of the day. A lot of us don't have access to those conditions, including me now that I am no longer with Instructables.
Luckily, carnivorous plants do well with artificial lighting so even basement dwellers can put together a lovely hungry garden. There is even a fantastically detailed article on the International Carnivorous Plant Society website that explains the lumens, color temperature and hours per day the plants need. There are many commonly available lighting setups or you could just buy LEDs and build your own. With the ease of controlling LEDs with Arduinos and Raspberry Pie microcomputers you could automate the whole thing from lighting to temp and hydrometers. Though, a lot of people have great luck stuffing the plants in a jar and setting them on a handy window sill.
As always, it's hard to beat "doing" as the best way to learn.
Thursday, January 23, 2014
Tuesday, November 19, 2013
Giro Privateer shoes
Earlier this year I got a pair of Giro Code mountain shoes and I love them. Unfortunately riding every day, doing a lot of walking off of the bike and generally punishing them, has worn them out. Far more fortunately, I am still riding for Blackburn Design, so Giro sent me a new pair of Privateer mountain shoes. While technically for trail riding, mountain biking shoes are ideal for getting around in dense urban environments when you need to be on and off of the bike but still want the performance of a dedicated cycling shoe.
After a couple weeks in the Privateers, I can say they live up to the Giro name and while different and lower priced than the Code shoes, I wouldn't exactly say they aren't as nice. The Privateer lacks the EC90 carbon last of it's up scale twin, leaving it more flexible and not offering quite the same efficiency. However, this also leaves the shoe slightly more comfortable off the bike as it has a bit more flex when walking. The hardware and fit are essentially the same with very few cosmetic differences side by side. All said and done, it's probably a better(in some ways) urban and short distance shoe than the Code but it would be hard to go wrong with either.
Monday, November 11, 2013
Refrigerator pickles
It's fall, even in the bay area where it is never really winter. The wild berries are all but gone, root crops, cabbage and other late season crops are coming in. Apples are still in full swing but today we made refrigerator pickles. The kind my grandmother feels is a cop out but we all still eat them, including grandma, with side of Midwestern guilt for not going the full measure and canning them. I hadn't done refrigerator pickles outside of her kitchen before, I was short on time and needing to pickle the cucumbers or lose them soon. The unexpected realization was that even if I can only lay hands on a few cucumbers we can put up a jar or two without much effort. Small investment of time and resources for a fairly big payoff in the pantry, that's good right?
There are lots and lots of various brines and an array of vegetables to get creative with if you want to try pickling but an easy starter project is basic cucumber garlic dills. Most grocery stores carry dill, though not pickling dill, but you can grow it from seed if you can't find a place to buy it. It grows easily without much attention and you can dry it for later use.
You will need:
About 3 or 4 medium to large cucumbers
6 tbsp distilled white wine vinegar
4 cloves of garlic
3 cups water
3 tbsp kosher salt
1 bunch of dill
This will give you 3 to 4 16oz jars of pickles
The cucumbers should be washed and may be left whole or cut into any shape you like. If the skin is unbroken you may have to let them sit an extra day or so to pickle.
To make the brine, mix vinegar, salt and water until the salt is dissolved.
Sterilize your jars with hot water and place a single pealed clove of garlic and sprig of dill in each before packing with cucumbers. You will want to put as many cucumbers in each jar as will fit without smashing them and be sure to leave an inch or so open at the top so you can completely cover them with brine.
Once the jars are full top them off with brine, put the lids on and wait a two to three days. They are safe to eat at any time but won't be fully pickled for at least 48 hours and it will take at least that long for the taste to develop. Your pickles should keep in the refrigerator for 3-6 months or more.
I have had success using this brine with several kinds of cucumbers, okra and shallots. It's a great way to save garden produce and farm market treasures.
There are lots and lots of various brines and an array of vegetables to get creative with if you want to try pickling but an easy starter project is basic cucumber garlic dills. Most grocery stores carry dill, though not pickling dill, but you can grow it from seed if you can't find a place to buy it. It grows easily without much attention and you can dry it for later use.
You will need:
About 3 or 4 medium to large cucumbers
6 tbsp distilled white wine vinegar
4 cloves of garlic
3 cups water
3 tbsp kosher salt
1 bunch of dill
This will give you 3 to 4 16oz jars of pickles
The cucumbers should be washed and may be left whole or cut into any shape you like. If the skin is unbroken you may have to let them sit an extra day or so to pickle.
To make the brine, mix vinegar, salt and water until the salt is dissolved.
Sterilize your jars with hot water and place a single pealed clove of garlic and sprig of dill in each before packing with cucumbers. You will want to put as many cucumbers in each jar as will fit without smashing them and be sure to leave an inch or so open at the top so you can completely cover them with brine.
Once the jars are full top them off with brine, put the lids on and wait a two to three days. They are safe to eat at any time but won't be fully pickled for at least 48 hours and it will take at least that long for the taste to develop. Your pickles should keep in the refrigerator for 3-6 months or more.
I have had success using this brine with several kinds of cucumbers, okra and shallots. It's a great way to save garden produce and farm market treasures.
Wednesday, October 16, 2013
Making Peach Vinegar
After canning a batch of peaches recently I was reluctant to throw away the scraps. They smelled good and there was a fair amount of scrap. What to do with bruised peach flesh and skins? Hmm... How about peach vinegar? Wild yeast fermentation and conversion of the resulting peach liquor by further bacterial activity into vinegar. Pretty nifty trick. It's simple, takes mostly patience and provides another way to not let something go to waste.
There are many many sources online about fermenting and making vinegar. I'll include a bare minimum here and a few ideas for what to do with your vinegar. It should also be noted that while I used peaches, most any fruit will work. Most sources say citrus vinegars don't do as well and don't taste so great but that is admittedly hear say on my part. Peach, berry and other stone fruit vinegar is sometimes considered a drinking vinegar rather than something you might use for preservation. It has already graced our table in a nice peach vinaigrette and been made into a nice fizzy beverage. That alone would be enough to make a batch but I'm sure there are other uses ahead. Knowing that commercial vinegar is distilled to a standard 5% acetic acid, I'm left wondering what my recent batch is. That would certainly help if I intend to use it to make pickles or some other acid dependent thing. At least one source says this is a bad idea and that litmus paper cannot accurately measure the acidity of home brew vinegar. Not really worth getting sick over.
The basic method is nothing more than letting the fruit scraps ferment in sugar water, straining out the fruit and letting the resulting liquid acidify.
Sugar water
1/4 sugar dissolved in 1 quart of water
Make enough to cover the fruit in about a 3 or 4 to one ratio.
Put it into a glass or stoneware container, not metal. Cover the top with cloth or mesh to keep fruit flies out and let it sit for a week or so, stirring daily to prevent surface mold. Easy.
You will notice when it smells fermented. At this point strain out the fruit scraps and pour the whole thing back into the container you had it in and let it sit covered for a minimum of about two weeks but up to several months if you like. A white "scum" will form on top of the vinegar. This is the mother and should not be removed. Acetobactor is an aerobic bacteria and needs oxygen to do its job. Hence the floating mass on the surface of your liquid. Once your vinegar is at a point where you like it, you can bottle it or can it using plastic or old style glass lids. Vinegar will corrode metal lids and containers over time. Stick to glass, ceramic or plastic.
To make your peach vinegar beverage:
Add two or three tablespoons of peach(or other) vinegar to a pint glass, add a teaspoon(more or less) of your preferred sweetener and top off with ice and soda water.
For a dead simple salad dressing:
Splash enough vinegar over your salad to leave it wet, drizzle on the olive oil of your choice and top with sea salt and fresh cracked black pepper. Almost too simple to call it dressing but it makes for a very nice salad.
You can read more about vinegar at Bragg and if you want to speed up your vinegar making process as well as insure positive results, you could add a couple tablespoons of Bragg's vinegar to your batch after the fruit has fermented. This wasn't necessary with mine and I had no trouble with the three week process but it's out there if you want it.
There are many many sources online about fermenting and making vinegar. I'll include a bare minimum here and a few ideas for what to do with your vinegar. It should also be noted that while I used peaches, most any fruit will work. Most sources say citrus vinegars don't do as well and don't taste so great but that is admittedly hear say on my part. Peach, berry and other stone fruit vinegar is sometimes considered a drinking vinegar rather than something you might use for preservation. It has already graced our table in a nice peach vinaigrette and been made into a nice fizzy beverage. That alone would be enough to make a batch but I'm sure there are other uses ahead. Knowing that commercial vinegar is distilled to a standard 5% acetic acid, I'm left wondering what my recent batch is. That would certainly help if I intend to use it to make pickles or some other acid dependent thing. At least one source says this is a bad idea and that litmus paper cannot accurately measure the acidity of home brew vinegar. Not really worth getting sick over.
The basic method is nothing more than letting the fruit scraps ferment in sugar water, straining out the fruit and letting the resulting liquid acidify.
Sugar water
1/4 sugar dissolved in 1 quart of water
Make enough to cover the fruit in about a 3 or 4 to one ratio.
Put it into a glass or stoneware container, not metal. Cover the top with cloth or mesh to keep fruit flies out and let it sit for a week or so, stirring daily to prevent surface mold. Easy.
You will notice when it smells fermented. At this point strain out the fruit scraps and pour the whole thing back into the container you had it in and let it sit covered for a minimum of about two weeks but up to several months if you like. A white "scum" will form on top of the vinegar. This is the mother and should not be removed. Acetobactor is an aerobic bacteria and needs oxygen to do its job. Hence the floating mass on the surface of your liquid. Once your vinegar is at a point where you like it, you can bottle it or can it using plastic or old style glass lids. Vinegar will corrode metal lids and containers over time. Stick to glass, ceramic or plastic.
To make your peach vinegar beverage:
Add two or three tablespoons of peach(or other) vinegar to a pint glass, add a teaspoon(more or less) of your preferred sweetener and top off with ice and soda water.
For a dead simple salad dressing:
Splash enough vinegar over your salad to leave it wet, drizzle on the olive oil of your choice and top with sea salt and fresh cracked black pepper. Almost too simple to call it dressing but it makes for a very nice salad.
You can read more about vinegar at Bragg and if you want to speed up your vinegar making process as well as insure positive results, you could add a couple tablespoons of Bragg's vinegar to your batch after the fruit has fermented. This wasn't necessary with mine and I had no trouble with the three week process but it's out there if you want it.
Tuesday, September 17, 2013
BSA 574 Yucca Pack
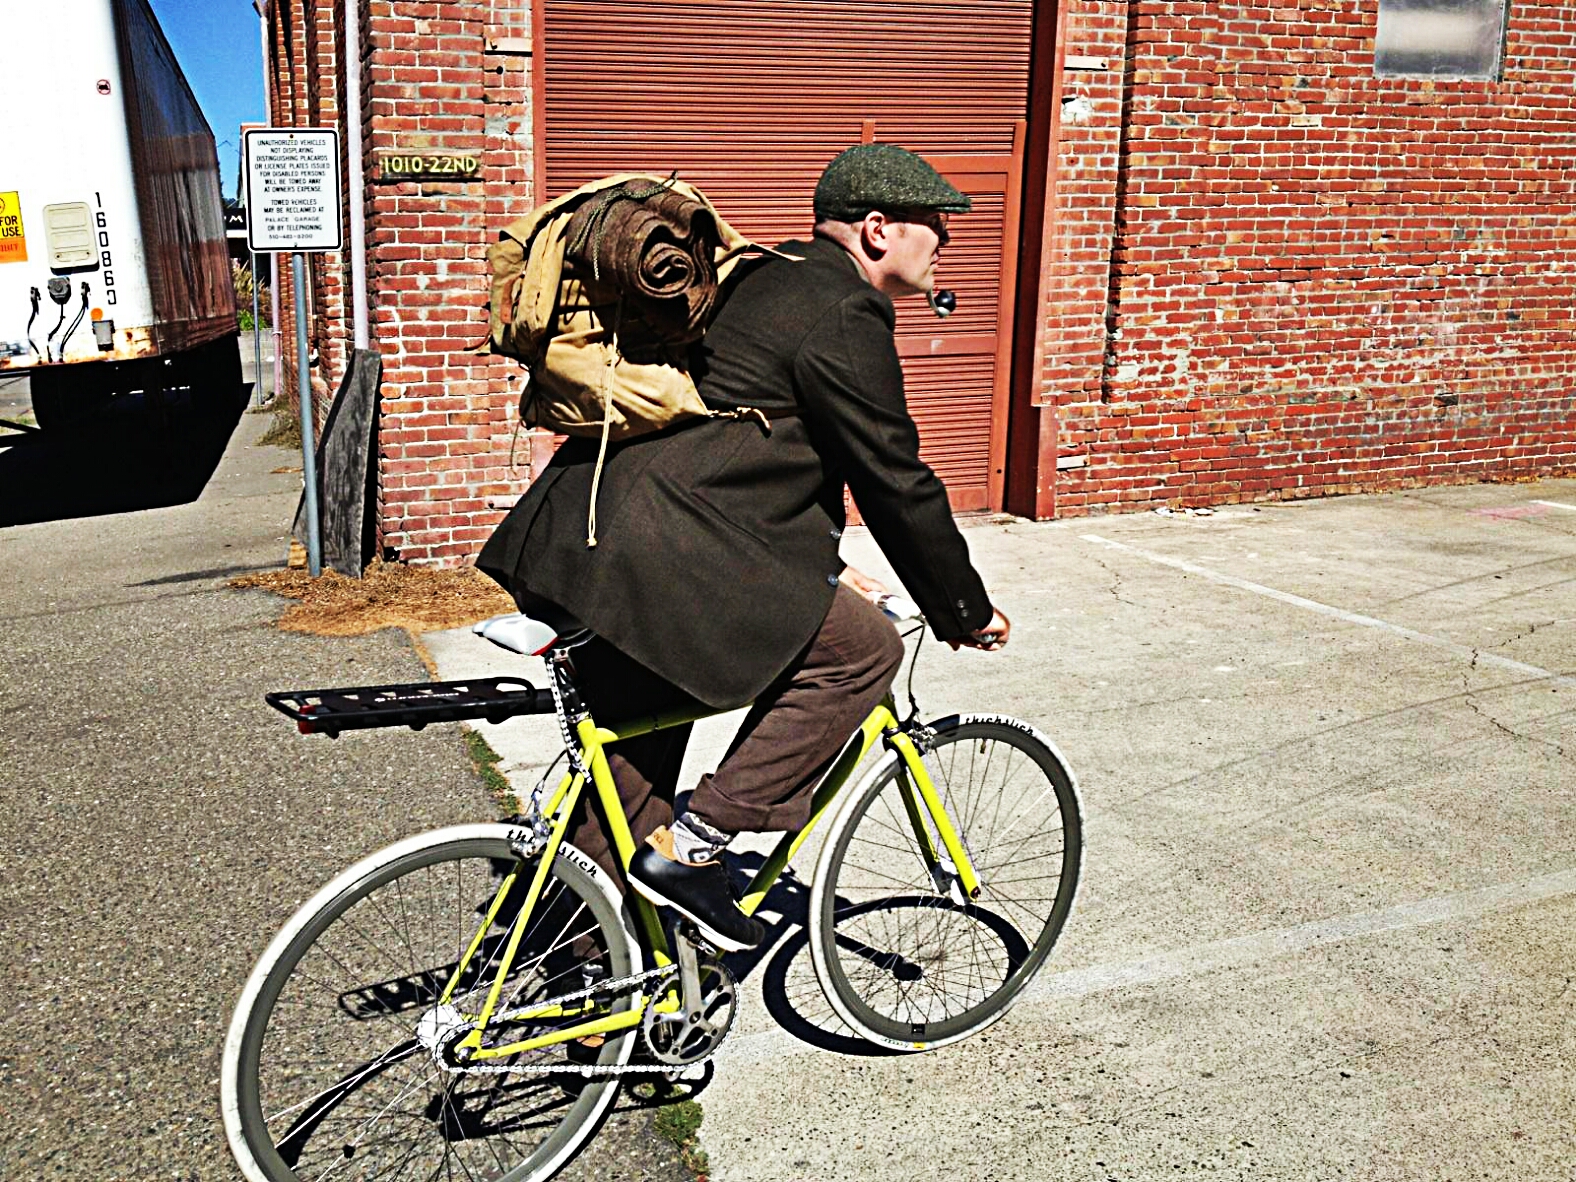
For me the BSA 574 Yucca pack will always be "the" pack. A timeless classic that has carried gear unimaginable miles on countless treks through urban and wilderness environments alike. It's a simple design with only two pockets, one internal and a smaller external is for the most part adequate. I have two vintage Yucca packs, an early one for the 1930's and a later model made in the 1960's that are of nearly the same design and both still in usable condition. Though not exclusively, I've carried canvas packs and bags most of my life, the Yucca being one of the first I remember using for Scouts as well as non-scouting adventures.
Diamond Brand built the first Boy Scout Yucca packs way back in 1931 and they remained in use for decades, both durable and versatile, especially with the addition of an external frame. Many scouts built frames themselves using everything from metal tubing to scrap wood and occasionally even saplings or tree branches. When packed lightly the Yucca is more than adequate for as much as a week on the trail depending on how much food you pack in, with a frame they are good for most any length expedition if you accept them as they are and don't expect them to perform in the same ways a modern rig built from man made materials will. If you follow the same simple rules scouts of generations past did, a Yucca pack will serve you well and outlast many of their modern counterparts. Personal experience with canvas packs and sea bags leaves me noting that I have used the same canvas duffels for years while theoretically better bags have succumbed to the scrap heap due to everything from broken zippers to torn cloth that wouldn't take a patch. Unless canvas molds and rots, it can be repaired. The Yucca in particular is pretty accepting of most repairs from replacing grommets to sewing torn fabric and seems to riveting on new leather parts.
Canvas isn't hard to care for but it does have a few special needs. It isn't waterproof though it will shed water for a bit and will do a pretty decent job in the rain if you Scotch Guard it. I have also used either a rain poncho big enough to cover my pack or covered it with a black lawn and leaf bag. Either method works fairly well. All in all, water is not a friend of canvas. So, rule 1 is keep it dry. That means let it hang and air out at night, don't set it on the ground and if it gets rained on, hang it up and let it dry. There is usually a handy tree branch to hang things on. If not you can use a tent pole or run a line and hang it from that.
This leads to rule 2, keep it clean. repeating the mention above, don't set your canvas pack on the ground. It'll get dirty. Dirt can get in between fibers act as an abrasive and cut them leading to holes. Dirt also often contains components other than "soil", food and other sticky things often attract bugs and other animals that will damage the canvas. So, avoid that as well and if your bag gets dirty, wash it and hang it up to dry. It's canvas after all, not hard to clean. I've washed Yuccas by hand in the past and more than once successfully in a machine using a mesh delicates bag followed by line drying the pack. Just do your best to look after a Yucca and know they are not hard to clean if they do get dirty.
In spite of these rules, I have also seen a heck of a lot of dirty beat up packs that have gotten rain soaked, spent time on the the ground and been generally abused but keep on going just fine and still provide years of service before being retired to end up as "art" on a wall or hall tree.
As of this writing I was finding serviceable examples, some with frames, on eBay for as little as $12 and $15 plus shipping. I have seen a few of the 1307(D), 573 haversacks as well but the 574 is more common by far.
Labels:
1307,
573,
573 haversack,
574 yucca pack,
Boy Scout pack,
BSA,
canvas pack,
diamond brand,
vintage packs,
yucca pack
Wednesday, September 11, 2013
Small Batch Canning
![]() |
| Peaches! |
Canners aren't always terribly expensive, some are as little as $20, $5 for the occasional garage sale find. Truth be known, you don't even need a canner for the small jobs, it's really just a deep stock pot after all. As long as the water covers the jars you're good to go for fruits, preserves and other acidic foods. A starter pack of jars is often less than ten bucks or again, available at garage sales and thrift shops for next to nothing and once you have some you can reuse them indefinitely with new lids. With everything on hand an opportunistic jar or two is well worth the effort.
So, keep your eyes open for fruit on the trail, your neighbors yard and of course local farm markets. If you barter well you might even trade fruit for canning, provided you can get yourself to part with some of your stores. In addition to the fun, having the best things on hand when you need them and being able to take pride in making things yourself, in this day and age of over processed everything, you control the production. You know exactly what went into your jars and you can feel good about making what ends up being both a frugal and healthy choice. Between, health, frugality, creativity and entertainment value, canning is an art that shouldn't be lost for any number of reasons all of which are good on their own and undeniable in combination.
Labels:
canning,
foraging,
home canning,
home preserving,
preserves,
wild harvest
Friday, September 6, 2013
Bushcraft
The Northern Midwest of my youth was often like living in a time capsule or living diorama of life a century out of date. Growing up under the care and tutelage of great grandparents born in the late 1800's no doubt added to the time warped towns, woods and country roads I was free to roam. Beyond things still being taught in Scouts and summer camps, volumes of seemingly ancient guidebooks and Victorian wisdom still in active memory was the tail end of an age where it was common to allow children to learn how to use tools safely by way of self injury. A world less fettered and free to act as both home and hands on learning lab. It really was great and while some of those skills are no longer terribly PC, they remain useful.
Even if you weren't blessed with that sort of environment there are numerous books like Wildwood Wisdom, first published in 1945, still on shelves and websites. One of my favorite books is a 1967 edition Scouting Fieldbook For Boys and Men that first served my uncle through his scouting years and then mine. My elders didn't call it "survival" by the way. It was simply, "camping". If you were merely surviving you were clearly doing several somethings wrong and shouldn't be out in the woods in the first place. I suppose that's what inspired me to write this post, the idea that there are many kinds of camping and not all of them rely on much gear or even any high tech gear and that doesn't have to mean you are "roughing it". In some ways, roughing it is a state of mind. So, a minor re-framing of "the great outdoors" and the addition of a handful of basic skills changes the experience of being out there quite a bit.I like "glamping" as much as the next person and having a big tent you can stand up in, a propane grill and cooler full of food is great when you aren't packing it in but the bulk of my camping has been with far less, often little more than an army blanket and a pocket knife. The big secret isn't that someone handed me a pocket knife at age five and said, "Try not to cut yourself." (I still have a scar on my thumb from that day), It was probably just being outside and getting used to it, out there, somewhere beyond the power outlets, pavement and climate control, just hanging out. Beyond a pocket knife and blanket, the radical improvements in comfort offered by an old sailboat mainsail, a coffee can and a metal spoon are exponential. A wine bottle makes a good water bottle once it's viniferous contents are gone. It can be amazing how far simple things go when you embrace how little humans "owned" in the past, how little we actually need and acquire a handful of skills.
I'm revisiting a book I haven't read in years but, like countless readers before me, have found lasting value within its pages. To paraphrase Thoreau, I support the idea that a [person] should be able to walk into the wilderness with nothing but the clothes on their back and feel like they left something behind. That idea holds meaning for me both in terms of being open to the idea that our natural surroundings are enough as well as the idea that we should be able to look after ourselves beyond mere survival. In essence, short of overcoming an injury, being lost in the wilderness can, and should, actually be fun.
Subscribe to:
Posts (Atom)